Google Search Console is one of the most valuable free SEO tools available to website owners. It provides deep insights into how your site performs in Google search results, highlights technical issues, and allows you to submit sitemaps or request indexing.
For many businesses, SEO is not a one-person job. You may need to grant access to:
- a developer,
- an SEO consultant or agency,
- your supervisor, or
- internal marketing team members.
Adding users to your Google Search Console property allows collaboration while keeping access secure. However, it is equally important to assign the right permission levels to each user. In this guide, we’ll walk through the steps to add users, explain permission levels, and highlight best practices for access management.
Understanding User Roles in Google Search Console
Before adding users, you should understand the three main roles available. Each role has different levels of access and control:
| Role | Access Level | Key Capabilities |
| Owner | Full | Manage users, configure settings, view all data |
| Full User | High | View most data, take actions (but cannot add/remove users) |
| Restricted User | Limited | View-only access to select data |
Pro tip: Always give the lowest level of access required. For example, if someone needs to review only performance data, assign them as a Restricted User rather than as an Owner or Full User.
Add a User to Your Search Console Property
Step 1: Log In to Google Search Console
Start by logging in to Google Search Console with the Google account that has owner access to your property. Once logged in, you will see the dashboard overview, which displays data snapshots for your selected site.
You may have verified a domain property, a URL-prefix property, or both.
- Domain property: Includes all subdomains (m, www, and so on) and multiple protocols (http, https, ftp).
- URL-prefix property: Includes only URLs with the specified prefix, including the protocol (http/https).
Choose a domain property to provide access for broader, overarching visibility across all subdomains and subfolders. Choose a URL-prefix property to provide access for narrower, more specific visibility to one version of your site.
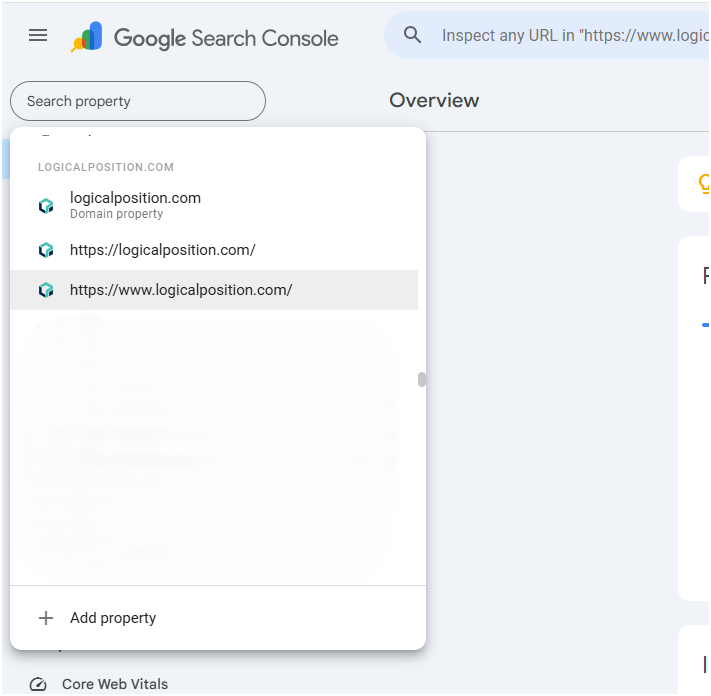
Step 2: Ensure You Are in the Correct Property
This step is critical. Many users manage multiple websites or have verified multiple versions of the same website. Granting access to the wrong property can cause confusion among team members, who may make changes for the incorrect version of the site.
To confirm you are in the right property:
- Look at the property selector dropdown in the top-left corner of the dashboard.
- Select the correct domain or URL-prefix property.
- Double-check that the property matches the website to which you intend to share access.
Pro tip: If your business owns multiple domains (example.com, example.net, example.org), carefully confirm.
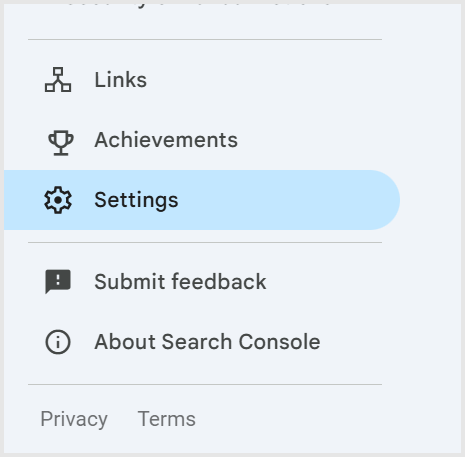
Step 3: Open the Property Settings
After selecting the correct property:
- Click on the Settings (gear icon) in the left-hand navigation.
- Review property details to make sure they match the site you want to manage.
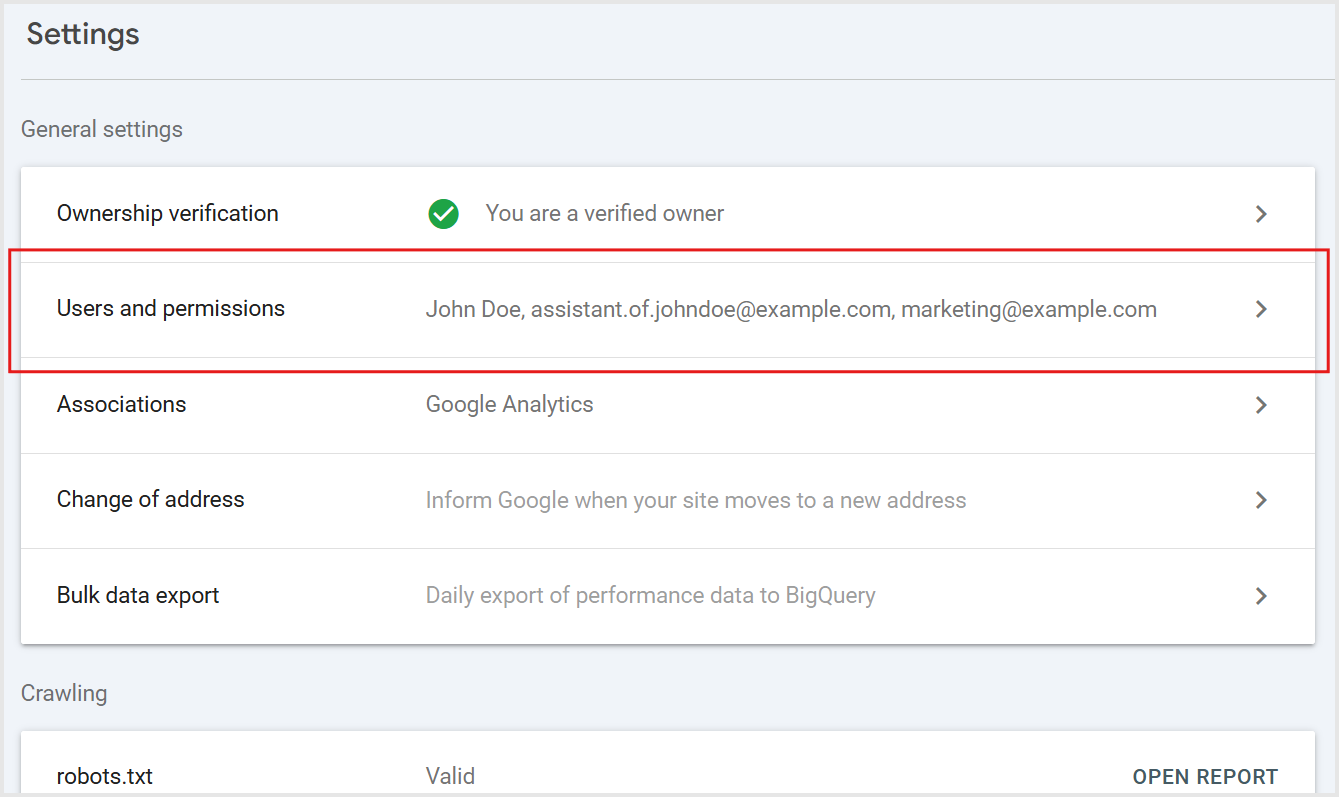
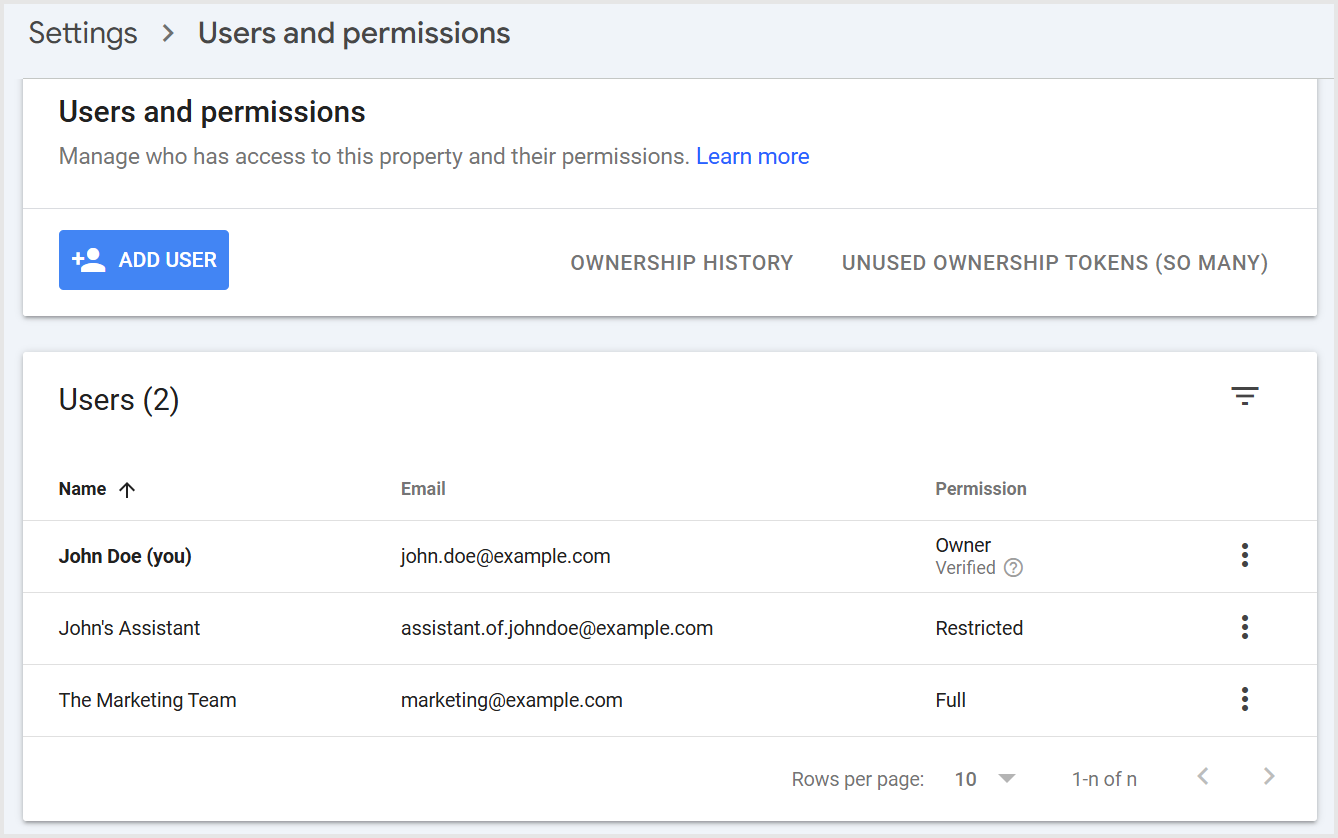
Step 4: Navigate to Users and Permissions
From the Settings menu:
- Select Users and permissions.
- Review the existing user list to understand who already has access.
- This is a good time to check if outdated accounts need to be removed, such as former employees, contractors, or other third parties that should no longer see your site’s search data.
Step 5: Add a New User
Now it’s time to add the new user:
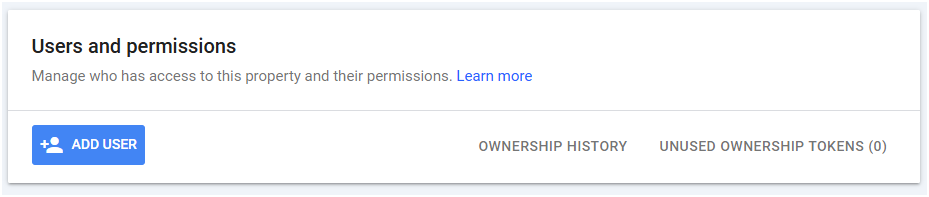
- Click the Add User button.
- Enter the user’s Google account email address.
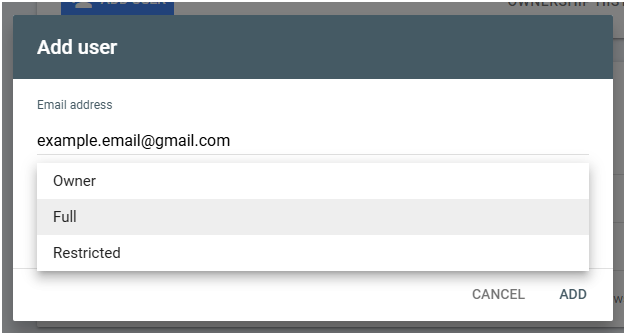
- Choose the Permission (Full or Restricted).
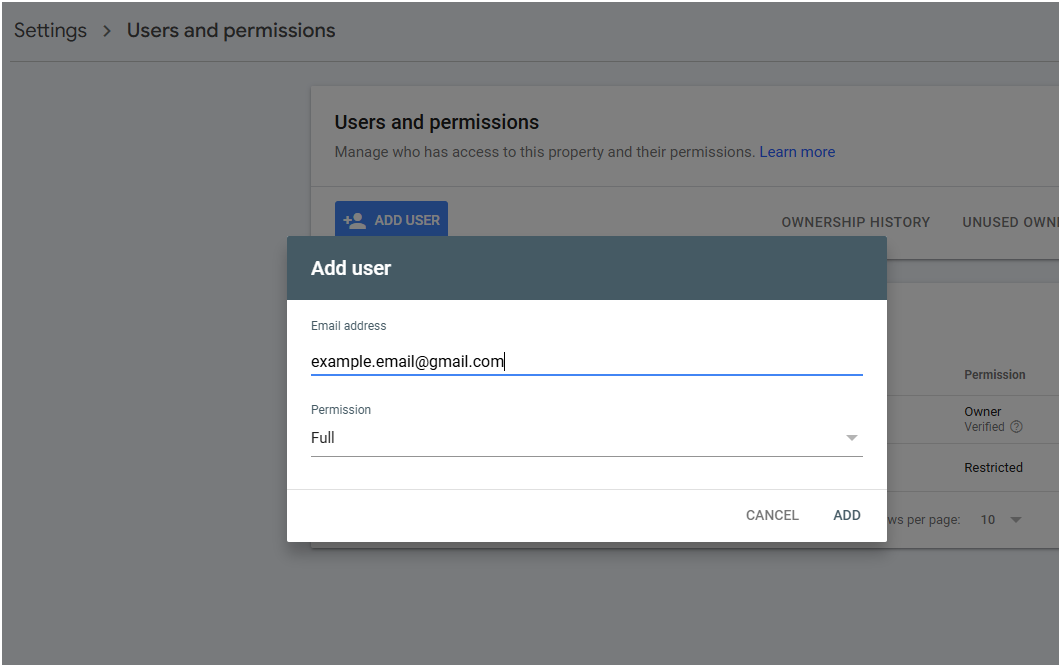
NOTE: You can delegate ownership here. However, to become a “verified owner,” you must verify ownership using the property ownership methods. At Logical Position, we create your account and delegate ownership to you.
Step 6: Save and Confirm
Once you’ve entered the user’s details and selected their permissions:
- Click Add to confirm.
- The new user will now appear in the list of users.
- Inform the user they can log into Google Search Console and access the property.
And there it is: lo and behold, you successfully added a new user to your search console property. You should now see the new user added in the “Users” section of Users and permissions.
Best Practices When Adding Users
Managing access effectively ensures both security and smooth collaboration. Keep these best practices in mind:
- Assign minimal access: Give only as much access as needed for the role.
- Review access regularly: Audit user lists every quarter at the minimum.
- Remove inactive users: Delete outdated accounts, as they are a security risk.
- Document access: Keep a record of who has what role for accountability.
Troubleshooting Common Issues
Adding users is usually straightforward, but there are a few common problems you may run into:
- User does not receive an email notification: Ask them to log into Search Console directly, as invitations do not always send an email.
- User cannot see the property: Ensure you added them under the correct property and that they are logging in with the right Google account.
- Changing user roles: You can adjust permissions at any time by editing a user in the Users and permissions panel.
- Ownership disputes: If ownership is unclear or multiple people claim ownership, you may need to reverify property ownership in Google Search Console.
For more troubleshooting tips and tricks, see Google’s Search Console documentation here.
Managing Access for SEO Success
Adding users to Google Search Console is simple but requires careful attention to detail. Ensuring you are in the correct property, assigning the right roles, and following best practices will help you manage access securely and effectively.
A well-managed Search Console account empowers your team to:
- Monitor SEO performance.
- Identify and fix website issues.
- Collaborate effectively across departments.
Google Search Console gives you valuable insights, but turning that data into growth takes expertise. The SEO experts at Logical Position combine hands-on experience with AI-enhanced SEO strategies to help businesses like yours monitor performance, fix technical issues, and improve visibility in both traditional and AI-powered search.
Don’t just manage access. Reach your site’s full potential.